Pages

Thursday, April 30, 2015

Painted Blooms Thank You Card with a Clever Technique

Here's a fun post for you today for how to make a really great card that is quick, cute, easy ... and fun to send.  Start out with a Crushed Curry card base, add a Project Life Journaling Card, punch the top edge of it (Spiral Border Punch) to add creative interest, stamp your sentiment,  add a strip of DSP and some punched flowers, put it all together ... and sit back and admire.
I tried something different on the envelope this time.  I used a strip of DSP right across the front of the envelope.  I also added some rhinestones to the flowers and some sponging to the edges of my journaling card.
Have you spotted my clever technique yet?  After stamping the 'thank you' in Memento Ink, I cleaned my stamp, inked it up again with Crushed Curry ink and stamped the 'thank you' again, off-setting it from the black text.  I think it really adds a lot to the card.
- Click on the tab at the top of the page to see my class schedules and registration policies or click on the left for sneak peeks. 
- Thanks for stopping by my little corner of the blogging world.
- Come back soon and come back often for more creative inspiration.

Wednesday, April 29, 2015

Would you like some eggs with that? Metallic eggs, that is...

Eggs aren't just for eating and they aren't just for Easter.  I've made some for my Spring decor that I like so much, I just may leave them out for a long, long time.  It's so much fun to make something that you can enjoy in your own home.  It helps make your house a home.  Here are some very fancy eggs I made that have a beautiful vintage look to them.
All the Metallic paints and the Metallic Glaze are by Elegant Finish.  They come in a 10 oz. jar and I think they'll last me for about 80 years.  They are wonderful to work with and go on really nicely.  Of course, it's a super messy project because... well... they're eggs... and there's no flat surface to lay them down carefully in between coats.  I put 2-3 coats on each egg.
After all the paints and glazes were dry, I added Prima flowers, using a hot glue gun, except for the silver egg.  I added Mica flakes to that one, while the paint was still wet.  I don't know if I'd do that one again, because it was really messy, but I love how it turned out in the end.   I added a butterfly to the silver egg for a finishing touch.
A nice thing about changing seasonal decor is the thrill of opening a storage box from a previous year and thinking:  "Oh yes!  I made that last year and can't wait to put it out to enjoy again." 
Thanks for stopping by my little corner of the blogging world.  Come back soon and come back often for more creative inspiration. 

Tuesday, April 28, 2015

Project Life: Two Layouts... Sneak Peek

I've been working on a couple of Project Life layouts for the past several weeks.  I designed my layouts to show how you can use different layout templates and still have it transition and flow smoothly together.  I decided to add a 12 X 12" page into the mix.  I like how it all turned out and how it does truly work together.  Today, you only get a sneak peek at what I've done, because it's for my May 2 Project Life Class.  I still have openings and can take registrations up through noon on Friday, May 1.  I have a lot to share at this class and look forward to sharing it all with the lucky participants.  Here's your sneak peek:
- Click on the tab at the top of the page to see my class schedules and registration policies or click on the left for sneak peeks. 
- Thanks for stopping by my little corner of the blogging world.
- Come back soon and come back often for more creative inspiration.

Monday, April 27, 2015

A Birthday Layout in Honor of a Sweet Little Girl

My sweet Olive Jane has a birthday today ... a 4th birthday!  In honor of the most beautiful little girl in the world (IMHO), I have a birthday layout for you.  We're actually going to be making this in June at my Scraps and Prayers class.


... and once more, Happy 4th Birthday, my sweet Olive Jane!  We love you!
- Click on the tab at the top of the page to see my class schedules and registration policies or click on the left for sneak peeks. 
- Thanks for stopping by my little corner of the blogging world.
- Come back soon and come back often for more creative inspiration.

Saturday, April 25, 2015

Eggs Please ... Wooden Eggs, That Is

I love, love, love creating new seasonal decor that you can enjoy again and again, with the change of each season.  It refreshes my home and it refreshes my soul.  I've had these wooden eggs around for 2 or 3 years now and decided that, this year, I'd better get cracking on them... pun intended:)
I love how they turned out!
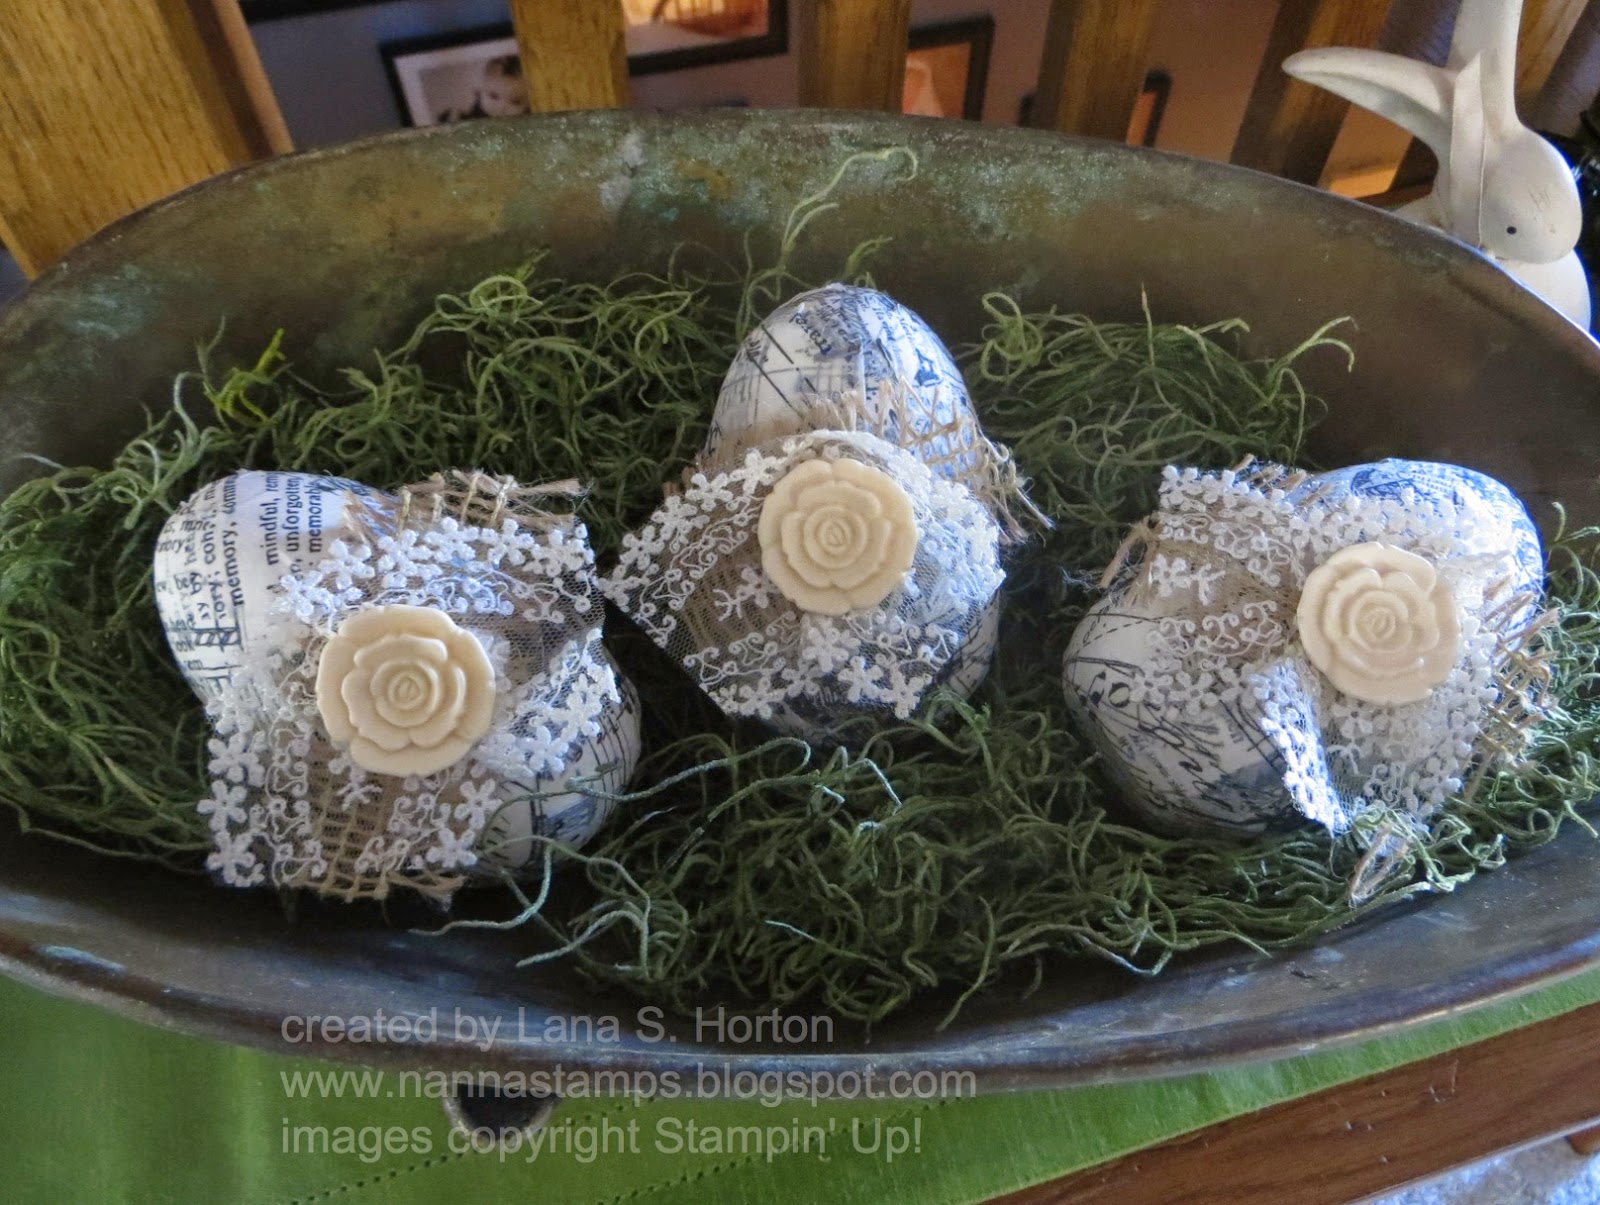
First, I painted my eggs with a couple of coats of White Gesso.  Then, after they dried, I covered them with tiny, torn pieces of Tim Holtz Tissue Wrap, using a Clear Gesso.  This is really messy, but well worth it.  These eggs did have a flat bottom, so that made it a lot easier to stand them up to dry between coats. 
Once all the papers were dry, I added bits and pieces of left-over buttons and laces from some of our Artisan Embellishment Kits.  I placed my eggs in a bed of grassy goodness and displayed them in an old vintage scale.  I love this scale and it's so much fun to find something that looks really good in it for adding to my decor displays.
My younger grandson did mention to me that:  "I'm not sure why you have that table, Nanna.  You don't really use it except for displays and decorations."  See, he's already thinking like a man:)  He did say that all my eggs were beautiful, so I guess I'll keep him.  Love my little guy.

- Click on the tab at the top of the page to see my class schedules and registration policies or click on the left for sneak peeks. 
- Thanks for stopping by my little corner of the blogging world.
- Come back soon and come back often for more creative inspiration.

Friday, April 24, 2015

More Card Ideas from Stampin' Up!

While I'm busy working on some other projects today, I'll let Stampin' Up! help share some great card ideas with you.  These are all made with retiring products.   Enjoy!

Want details for the featured cards as well as even more fun ideas for using products from our retiring list?
Click here and enjoy!

Now, click here for a quick review.

Coming up for May:
Saturday, May 2 / 1:00-4:00 / $25.
Saturday Stampers / Project Life Class
Note change of date from April 25 to May 2!!!

Saturday, May 16 / 1:00-4:00 / $18.
Saturday Stampers / Beautiful cards featuring our Framelits and Thinlits dies

Tuesday, May 19 / 5:30-7:30 / $15.
Scraps and Prayers / TBA
Note change of date!!! 

NOTE:
IN AUGUST, SCRAPS AND PRAYERS WILL BE MOVING BACK TO MONDAY NIGHTS.  WE'LL MEET THE 2nd MONDAY OF EACH MONTH:  5:30-7:30.

Pay to register at least 2 days prior to a class.  Classes are filling up fast and class size will be limited, so sign up ASAP if you're interested in a class.


Thanks for stopping by my little corner of the blogging world.  Come back soon and come back often for more creative inspiration. 

Thursday, April 23, 2015

Fun Ideas from Stampin' Up!

Here are some fun card ideas ... direct from Stampin' Up!  With products retiring very soon, it's fun to get out some of those stamps and play with them using new, fun ideas for making cards like these.


Want details for the featured cards as well as even more fun ideas for using products from our retiring list?
Click here and enjoy!

Now, click here for a quick review.

- Click on the tab at the top of the page to see my class schedules and registration policies or click on the left for sneak peeks. 
- Thanks for stopping by my little corner of the blogging world.
- Come back soon and come back often for more creative inspiration.

Wednesday, April 22, 2015

Butterfly Basics for Earth Day

My calendar reminds me that today is Earth Day, so Happy Earth Day.  What better way to enjoy Earth Day than with a card that is a tribute to nature.
This is actually one of the cards that we'll be making at my May 16 class ... all about making beautiful cards using our thinlits and framelits.  I have stamped ferns on the inside of the card and on the envelope, as well.
Good News:
You can now order the Butterfly Basics... as a stamp set and/or thinlits OR as a bundle.

Click here to see the retired list.
Please note --- If you are planning on getting something from the retired list, do not wait.  I cannot begin to tell you how many times I've had customers regret waiting and then, when they tried to order, it was too late.
     When supplies are gone ... that's it.
Now, click here for a quick review.

- Click on the tab at the top of the page to see my class schedules and registration policies or click on the left for sneak peeks. 
- Thanks for stopping by my little corner of the blogging world.
- Come back soon and come back often for more creative inspiration.

Tuesday, April 21, 2015

Nature's Perfection Meets Painted Blooms... and the Retired List

Here's another card for you today featuring Blackberry Bliss.  The more I play with this color, the more I love it.
I embossed my flower with Gold EP and then watercolored it with reinker and my Aqua Painter.
I used embossing on the inside of the card and the envelope and then used some sponging to add color to it.  I've used pieces of our jute ribbon, to get just the right size for my card.  I colored the ribbon with spritzing and then frayed the ends of it after I tied it, to give a fringed texture to it.
TODAY'S BIG NEWS:
It's that time of year... a bittersweet time of year when we find out what will be retiring.  Are you wondering what will be leaving us?

Click here to see the retired list.
Please note --- If you are planning on getting something from the retired list, do not wait.  I cannot begin to tell you how many times I've had customers regret waiting and then, when they tried to order, it was too late.
     When supplies are gone ... that's it.
Now, click here for a quick review.

Thanks for stopping by my little corner of the blogging world.  Come back soon and come back often for more creative inspiration.

Monday, April 20, 2015

Painted Petals with Gorgeous Sparkle

Here's a recipe for certain success in making a beautiful card.  First, create a beautiful focal piece.  Next, attach to a beautiful background.  Finally, add some cute little punched flowers.  Oh, and don't forget a coordinating envelope.

Let's take a look:
My color story is Melon Mambo, Whisper White, and Blackberry Bliss.
I wish you could see how shimmery the focal piece is in real life.  It's embossed with Iridescent Ice EP and is gorgeous, but just doesn't show up in a photo.  Mounting the oval piece onto a separate, embossed layer (Spring Flowers) really bumps up the card.
- Click on the tab at the top of the page to see my class schedules and registration policies or click on the left for sneak peeks. 
- Thanks for stopping by my little corner of the blogging world.
- Come back soon and come back often for more creative inspiration.

Friday, April 17, 2015

A Vellum Thank You Card

Today's card has a strip of vellum along the front, as well as a cut vellum flower for the focal piece.  All the vellum is colored on the back.  
I also cut an envelope liner out of DSP and then added another cut vellum flower to the inside of the card.  
The little 'thank you' banner is embossed with gold EP and then colored with watercoloring.  It is cut from watercolor paper... a scrap.  Saving and using scraps of watercolor paper makes for great little tags and/or banners on your cards.
- Click on the tab at the top of the page to see my class schedules and registration policies or click on the left for sneak peeks. 
- Thanks for stopping by my little corner of the blogging world.
- Come back soon and come back often for more creative inspiration.
Related Posts Plugin for WordPress, Blogger...