Pages

Tuesday, March 31, 2015

Lotus Blossom Trio of Cards

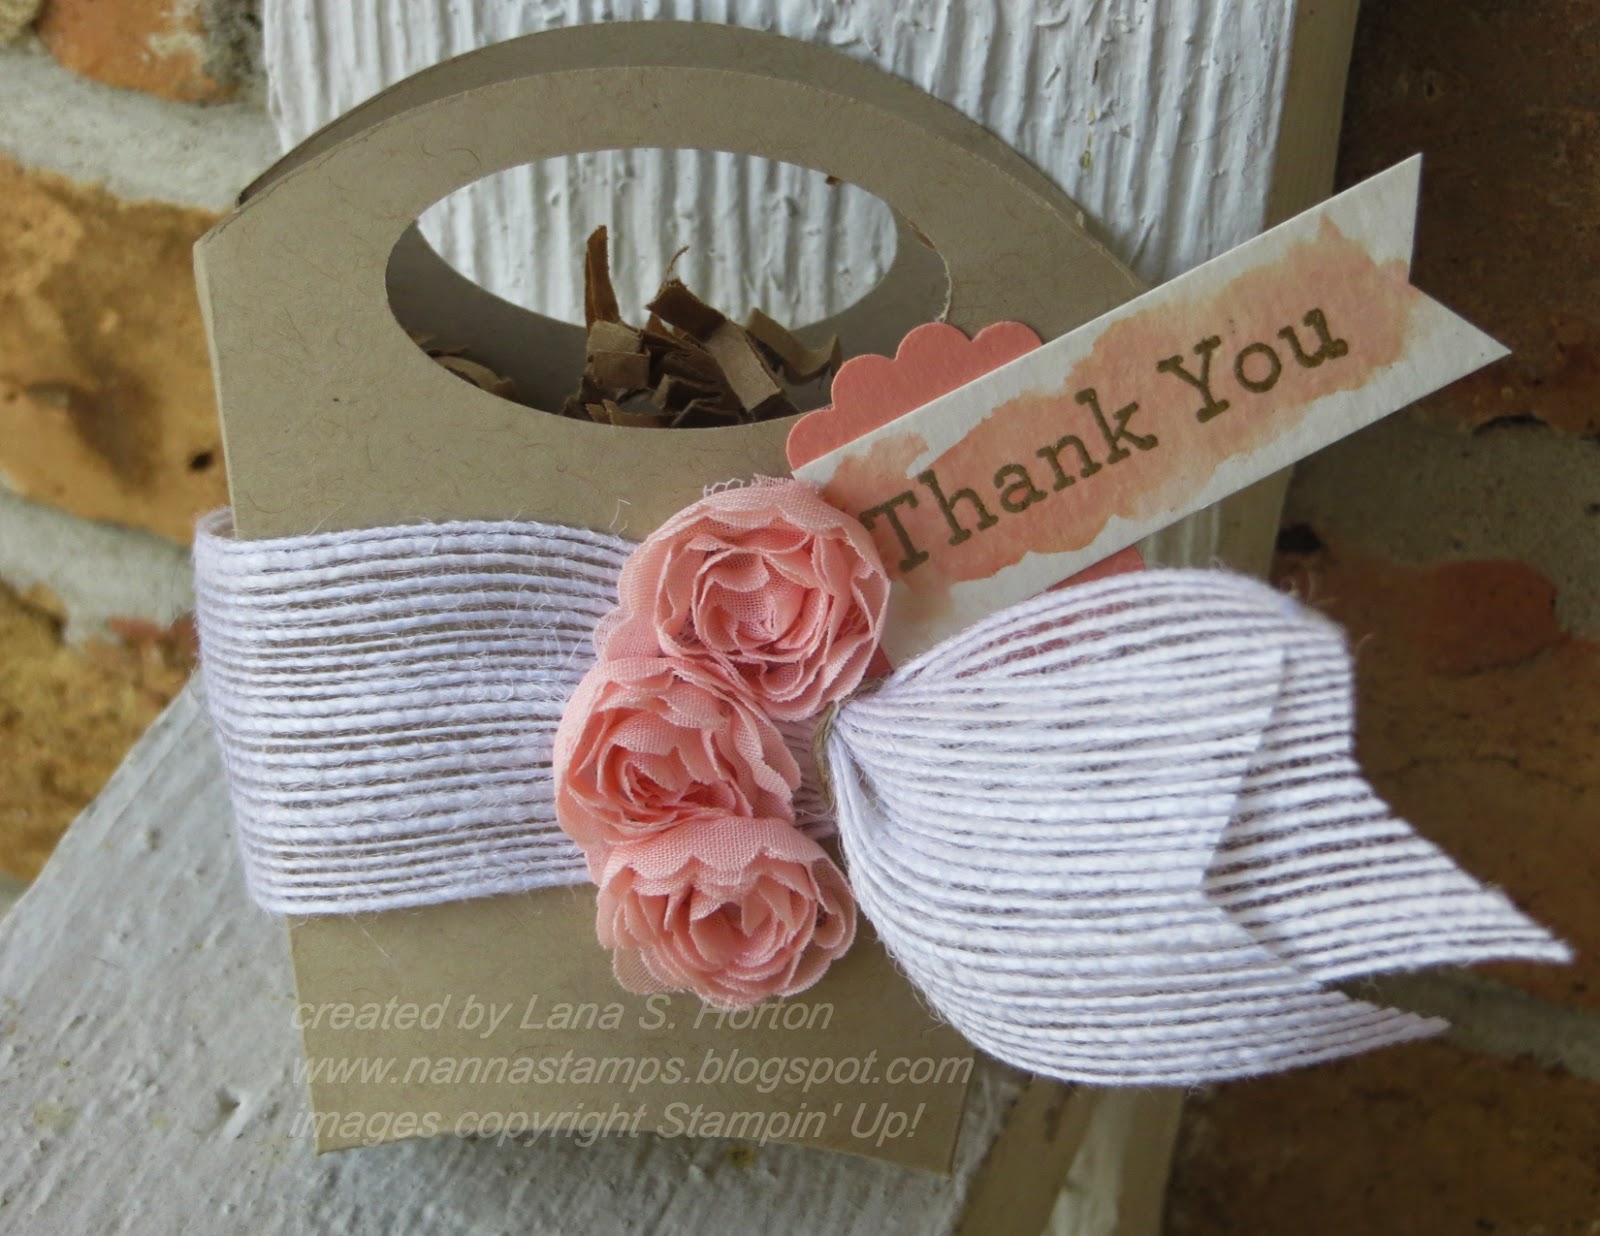
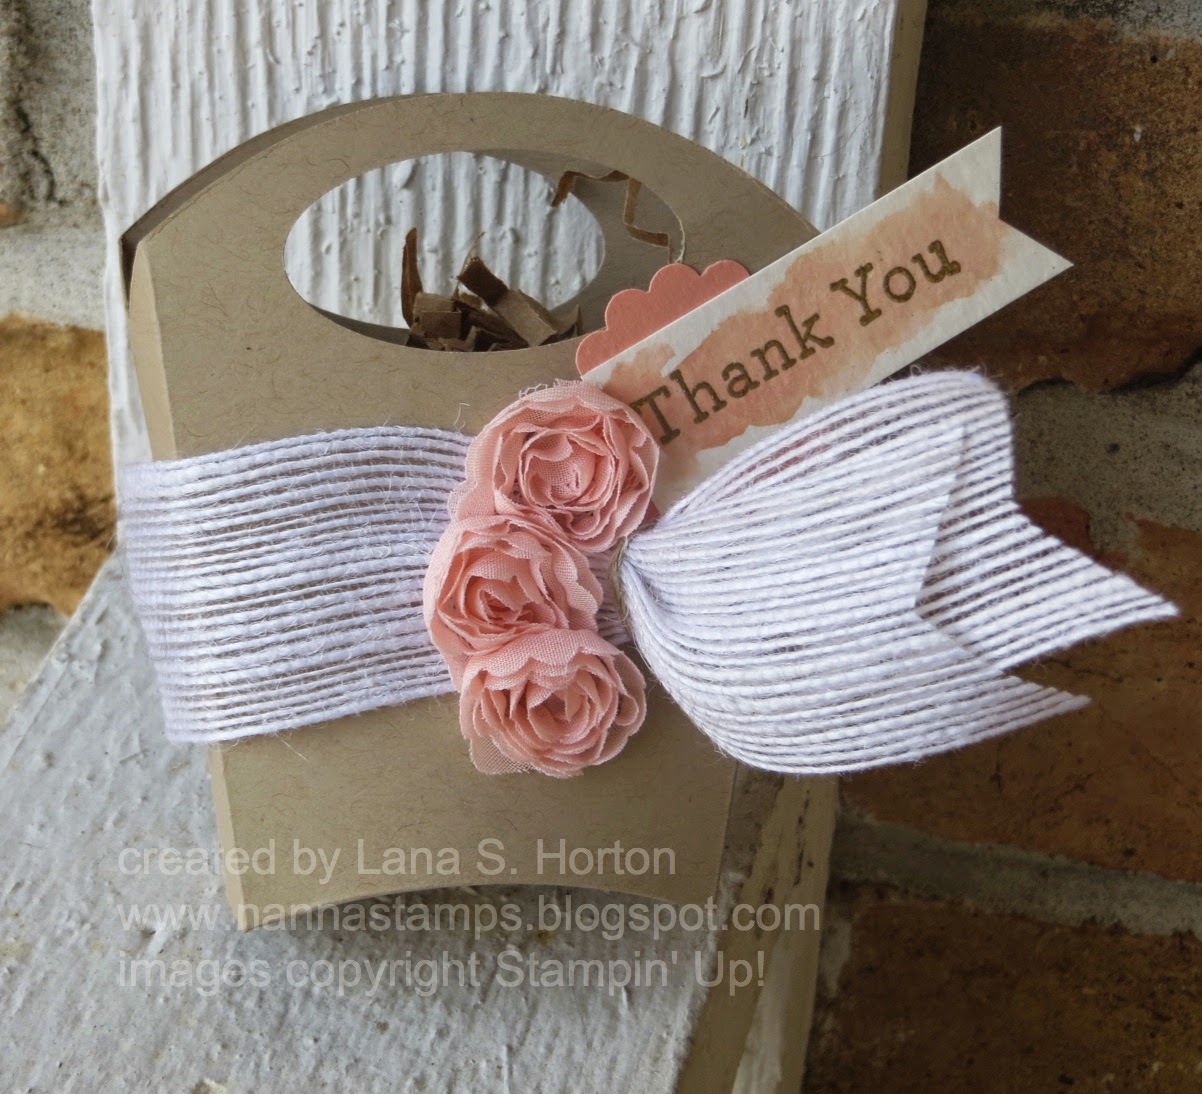
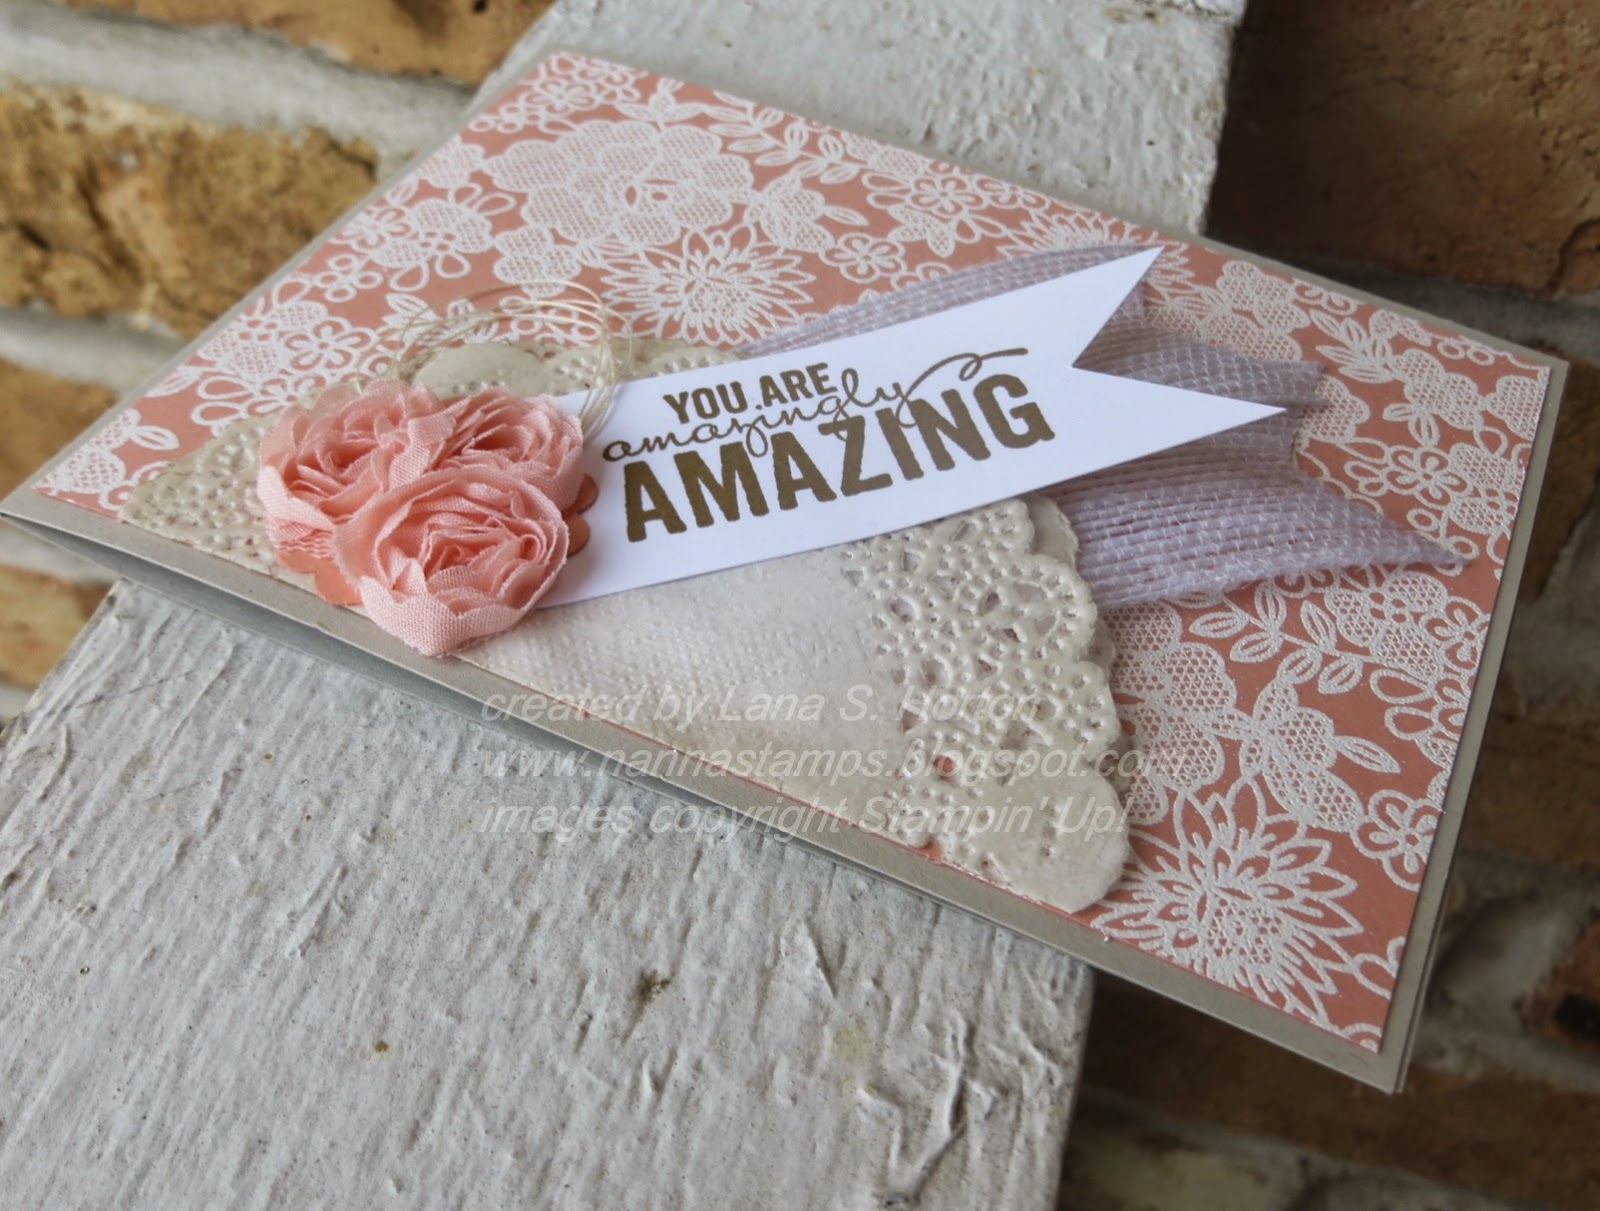
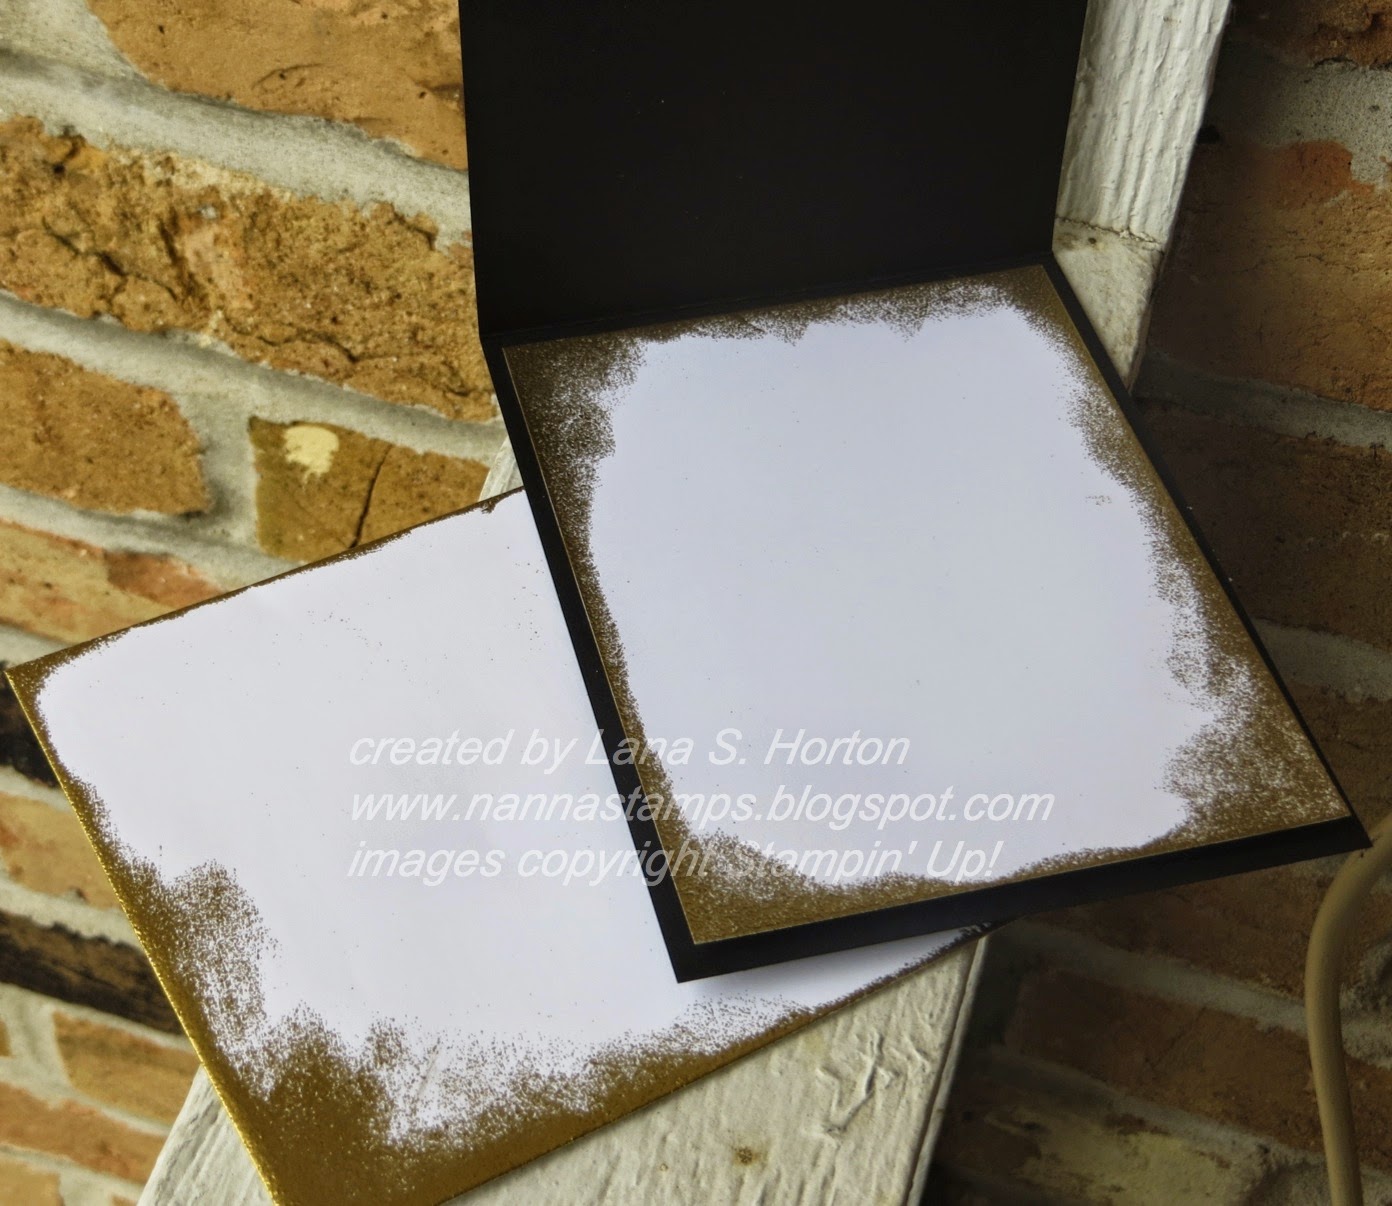
I have a trio of cards for you today.  Please enjoy and then tell me which one you like the best.  
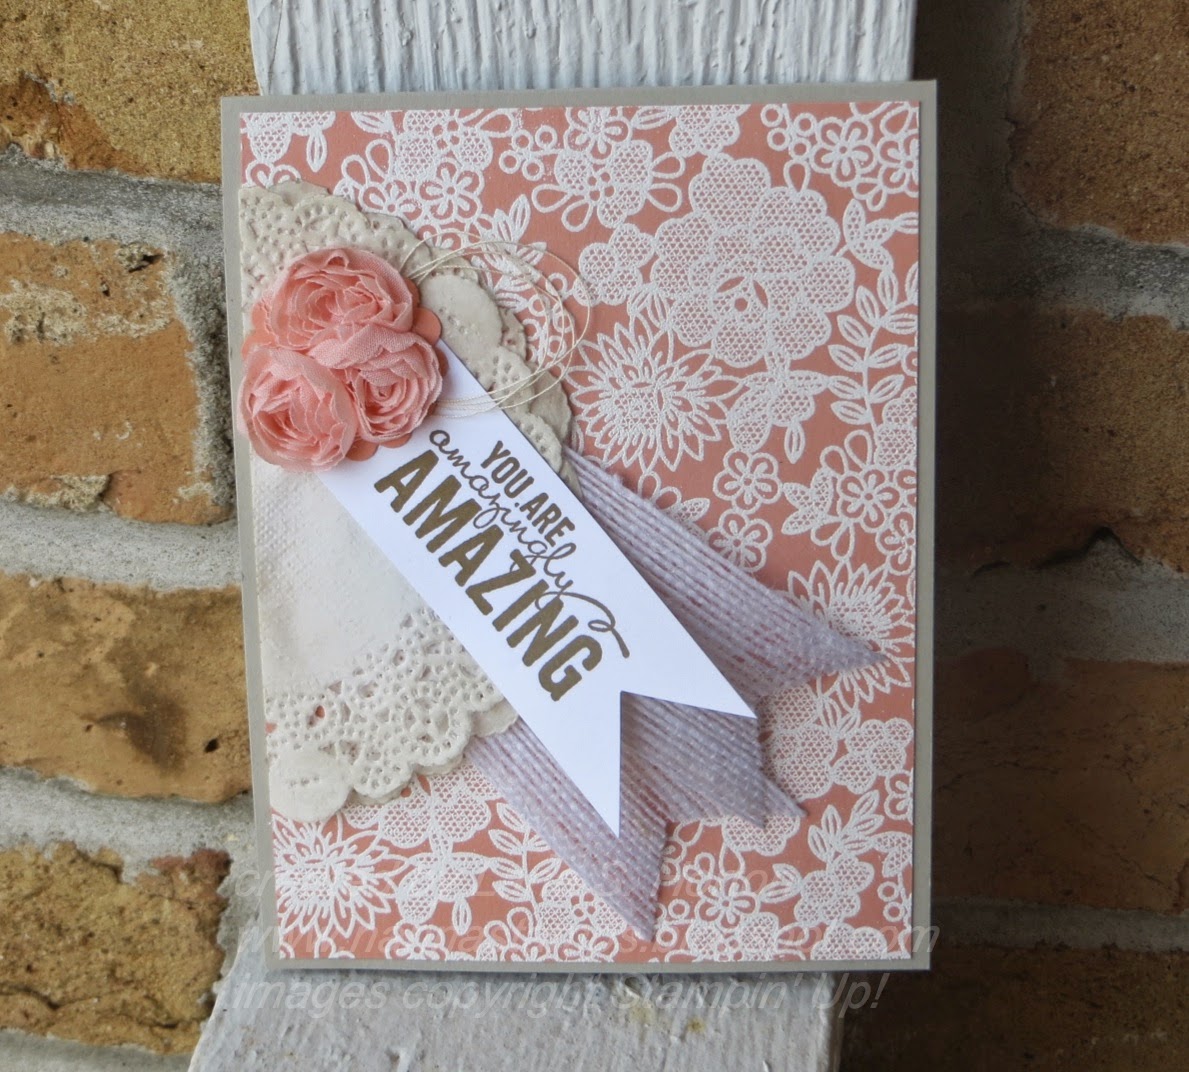
The first card has DSP as a background layer and an embellishment on the inside of the card.  It features some of our gorgeous organza ribbon and some speckles from Gorgeous Grunge.
The extra layers of white add a lot to this card.
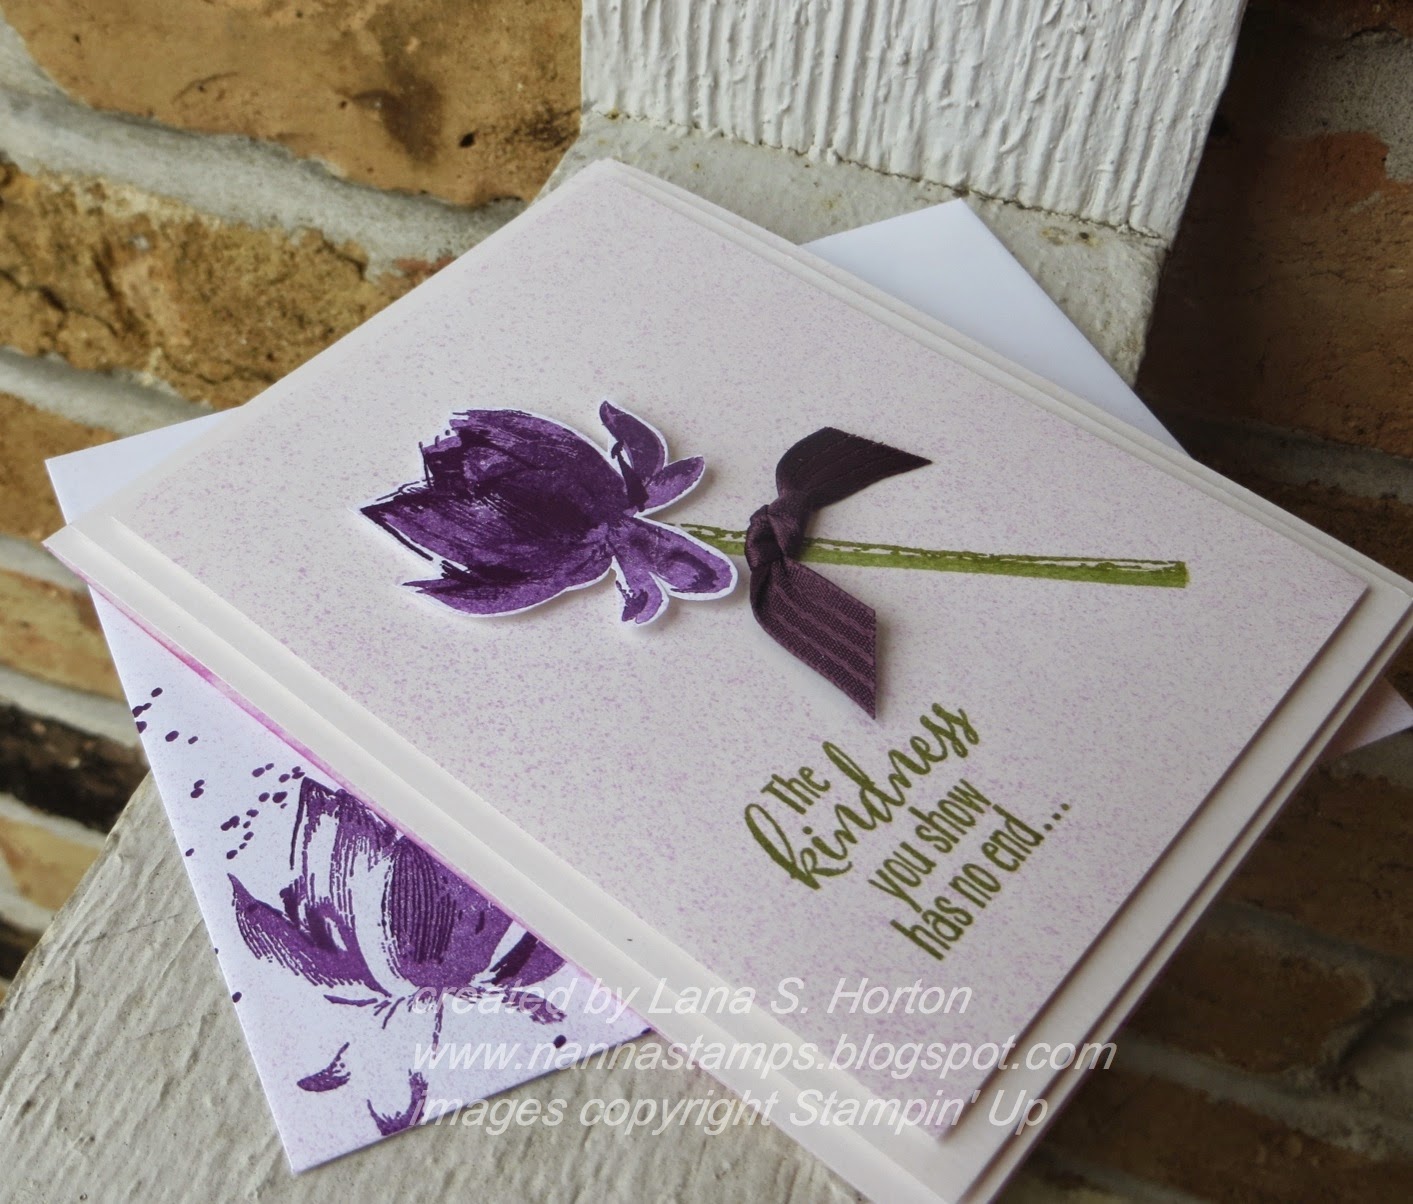
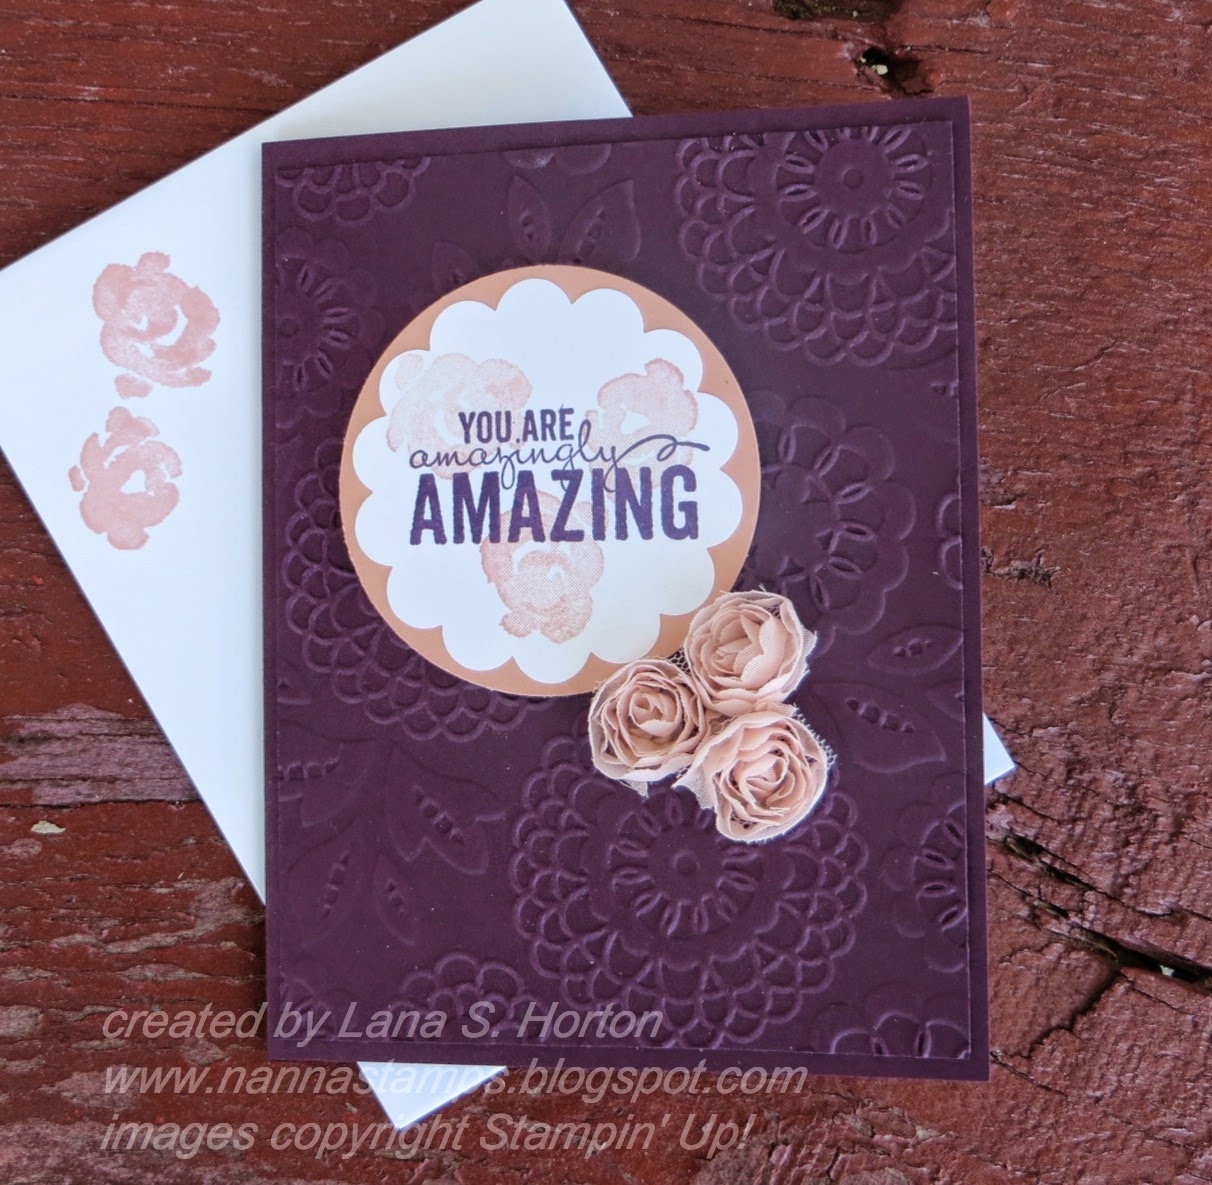
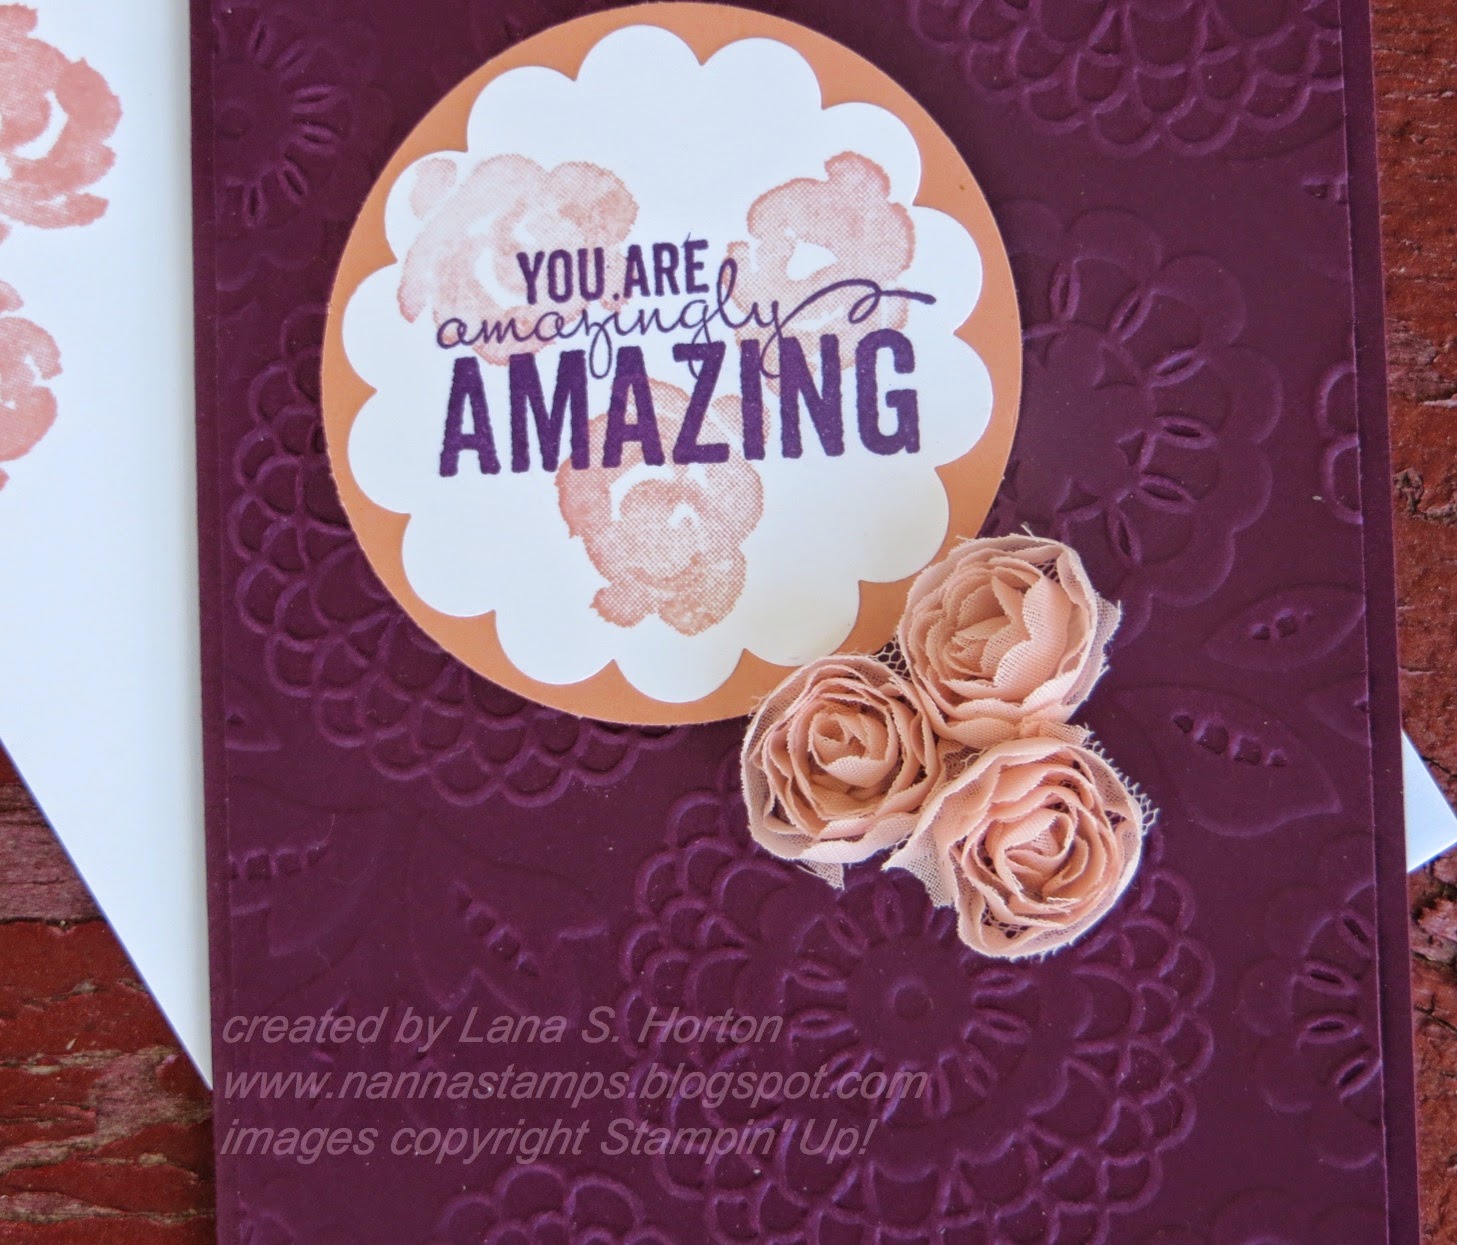
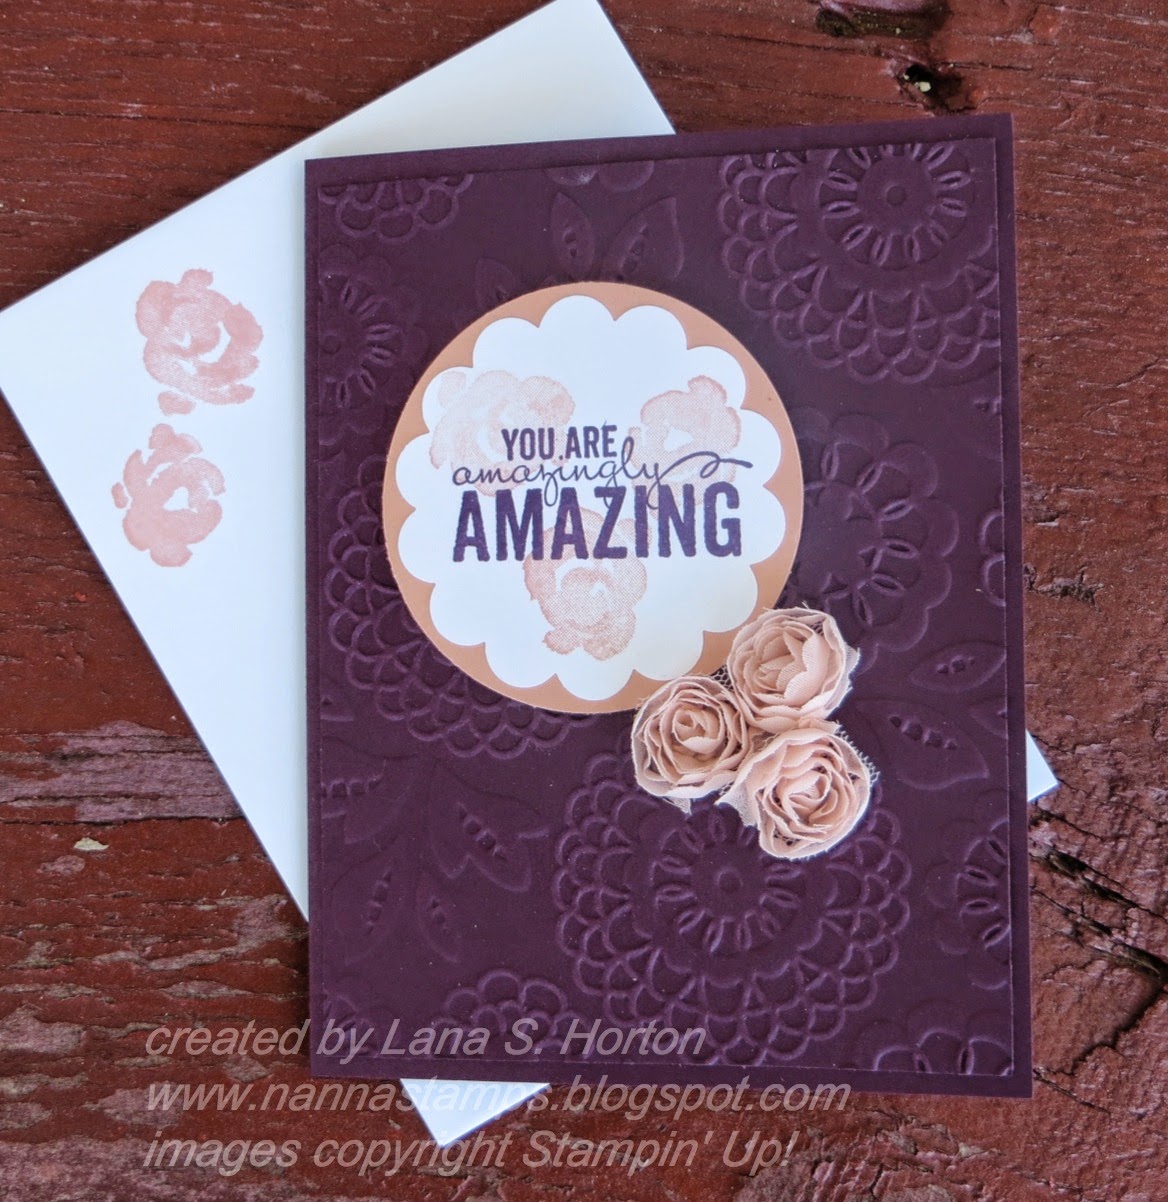
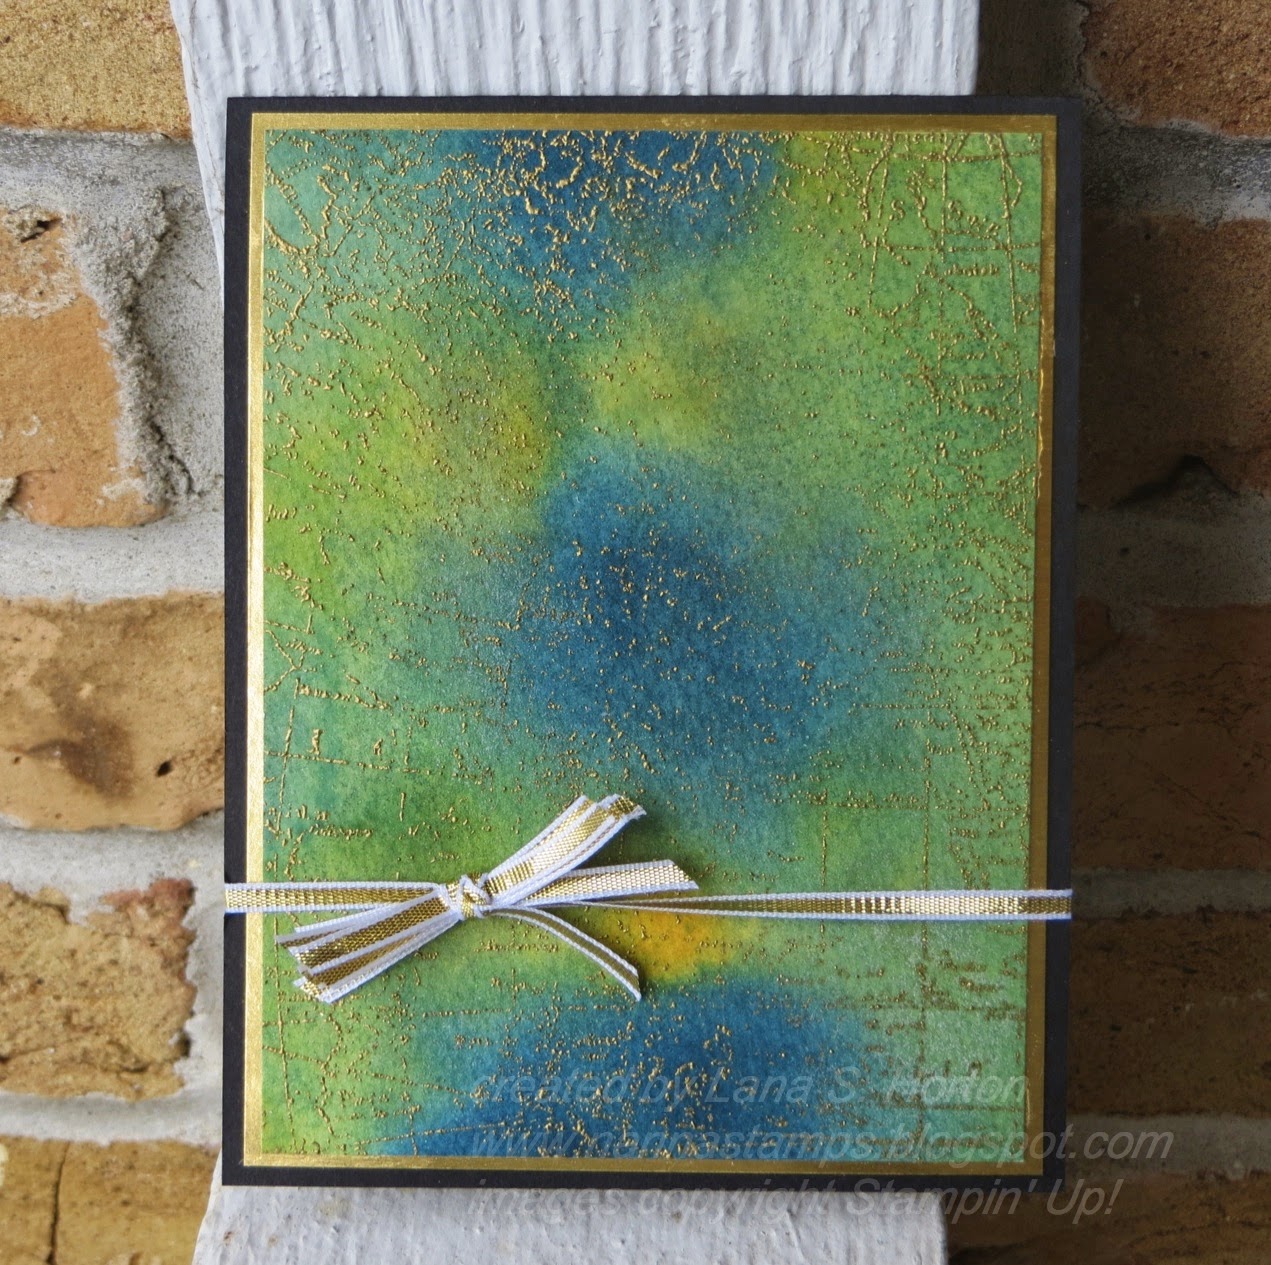
The second card features a layer that is spritzed with my Blackberry Bliss/Vanilla Smooch/alcohol mixture.
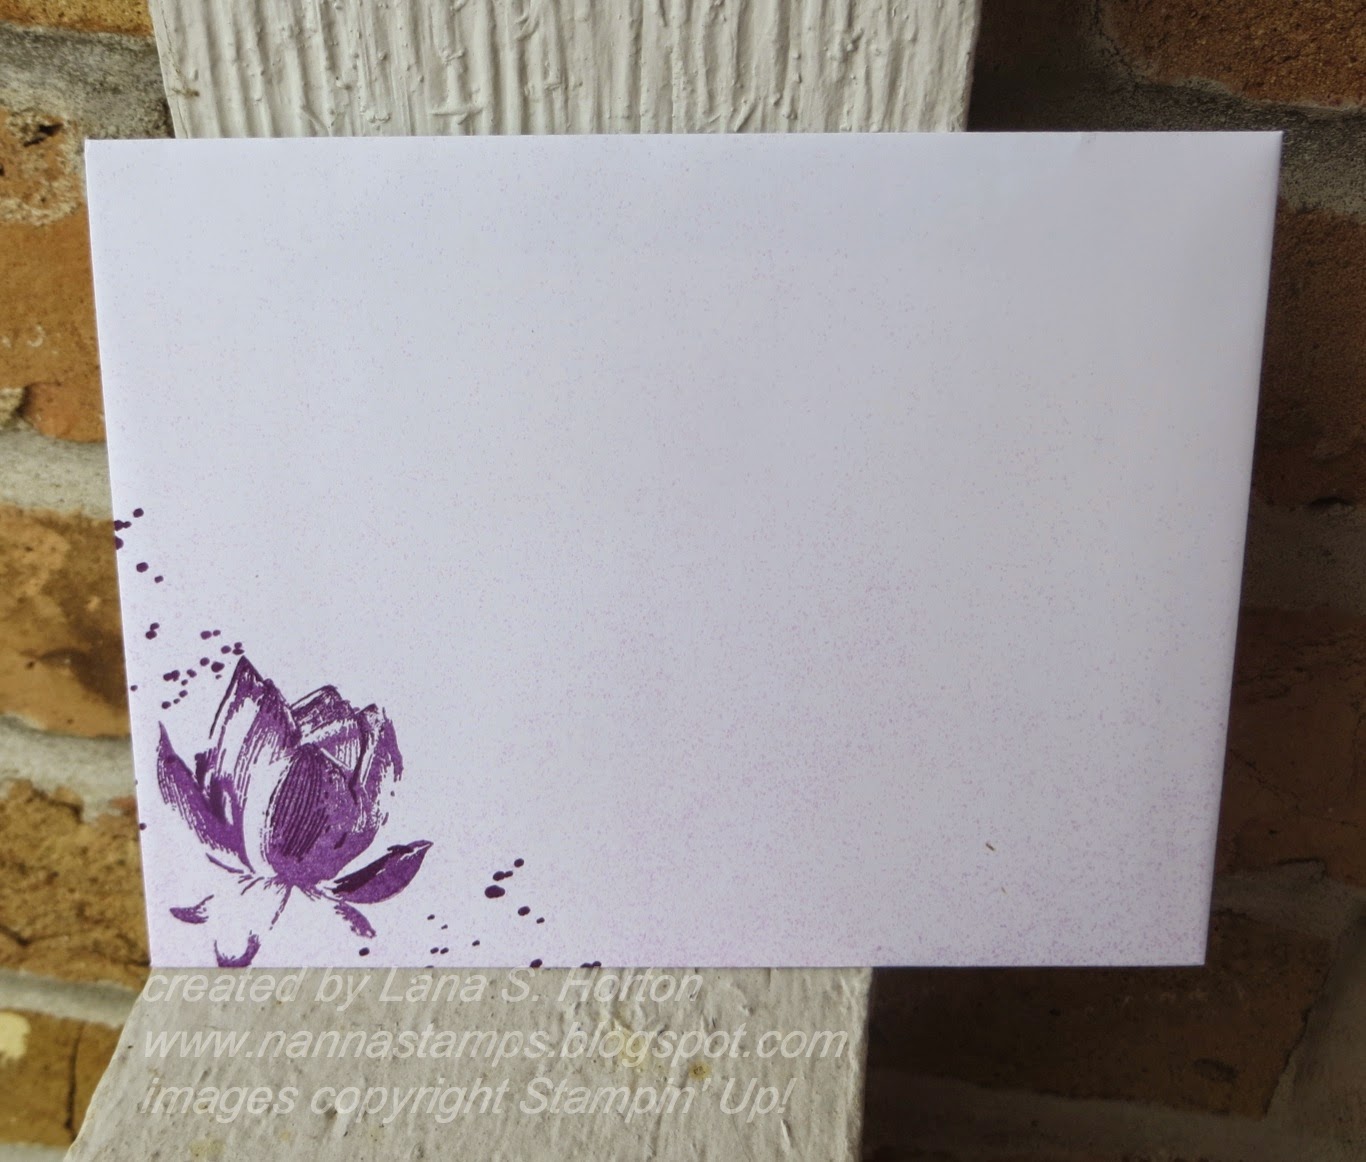
I added a tiny bit of spritz to the envelope, as well.
All the envelopes have a lotus blossom in the corner and a few Gorgeous Grunge speckles.
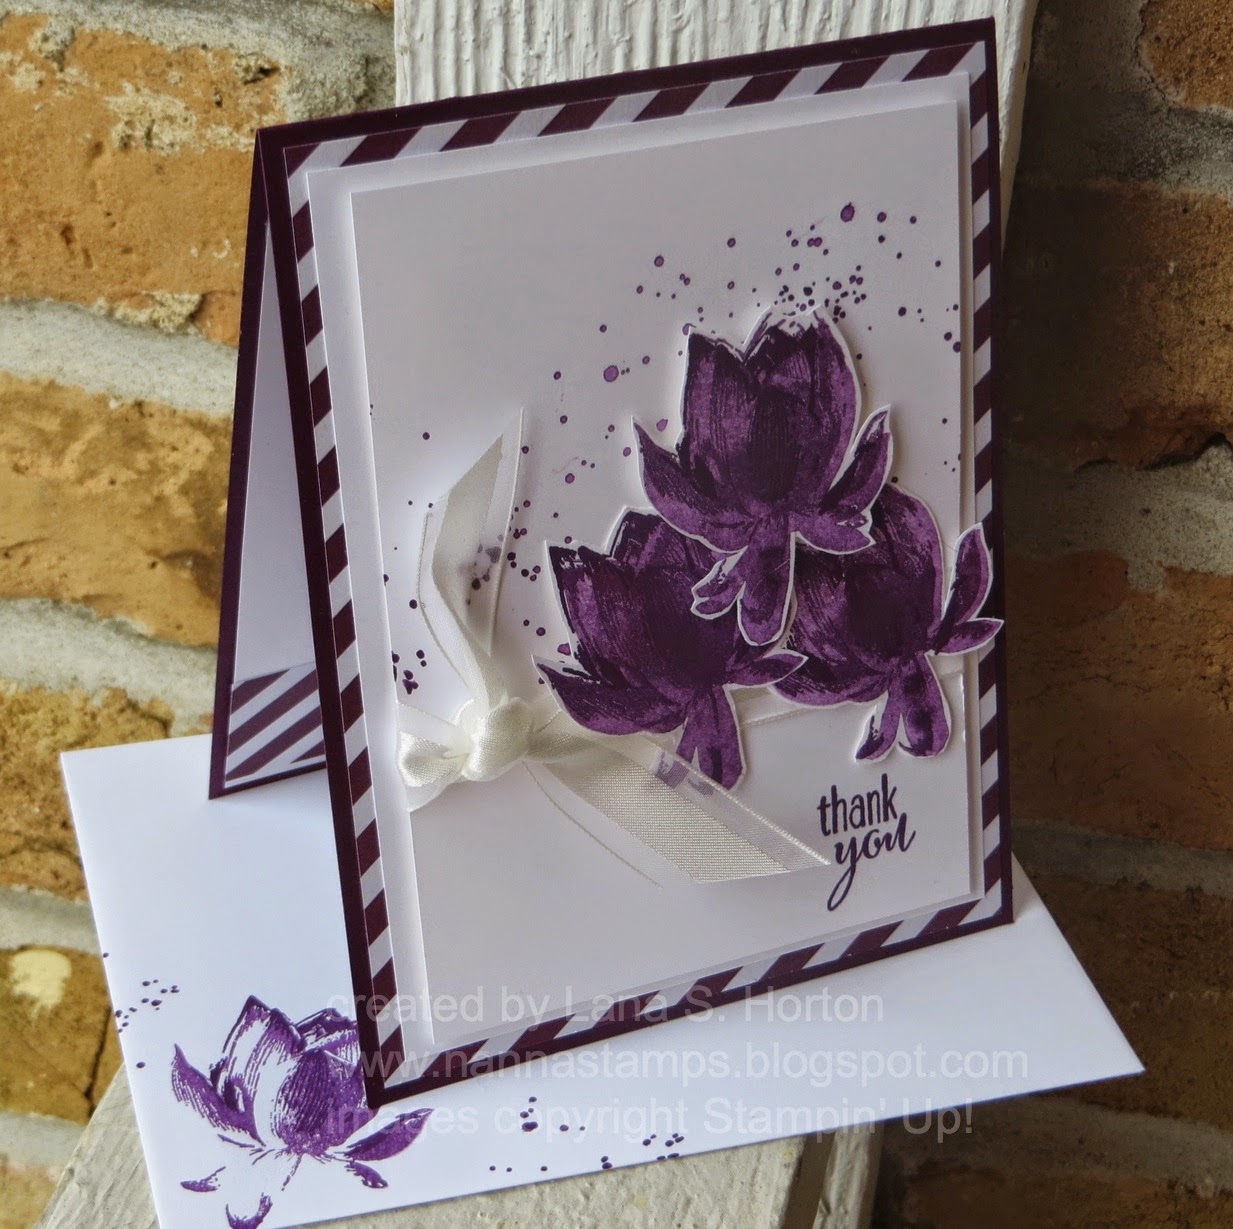
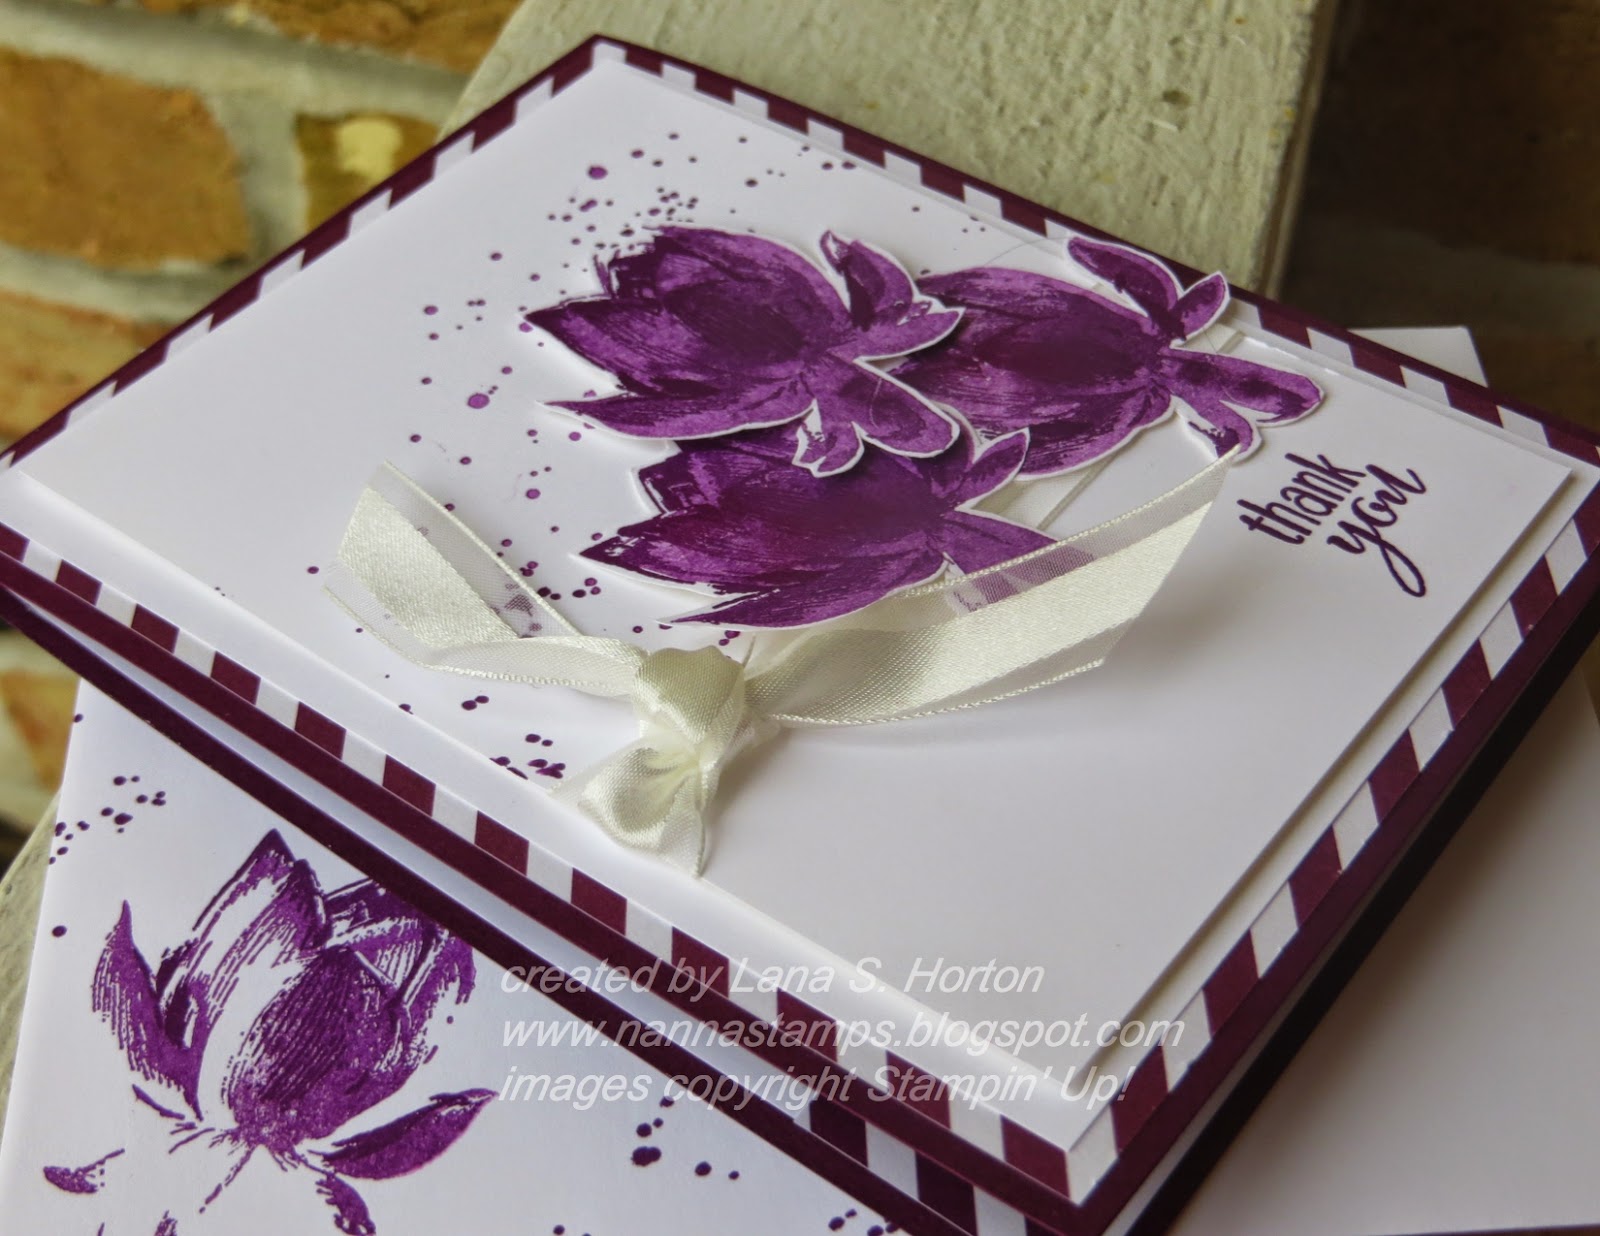
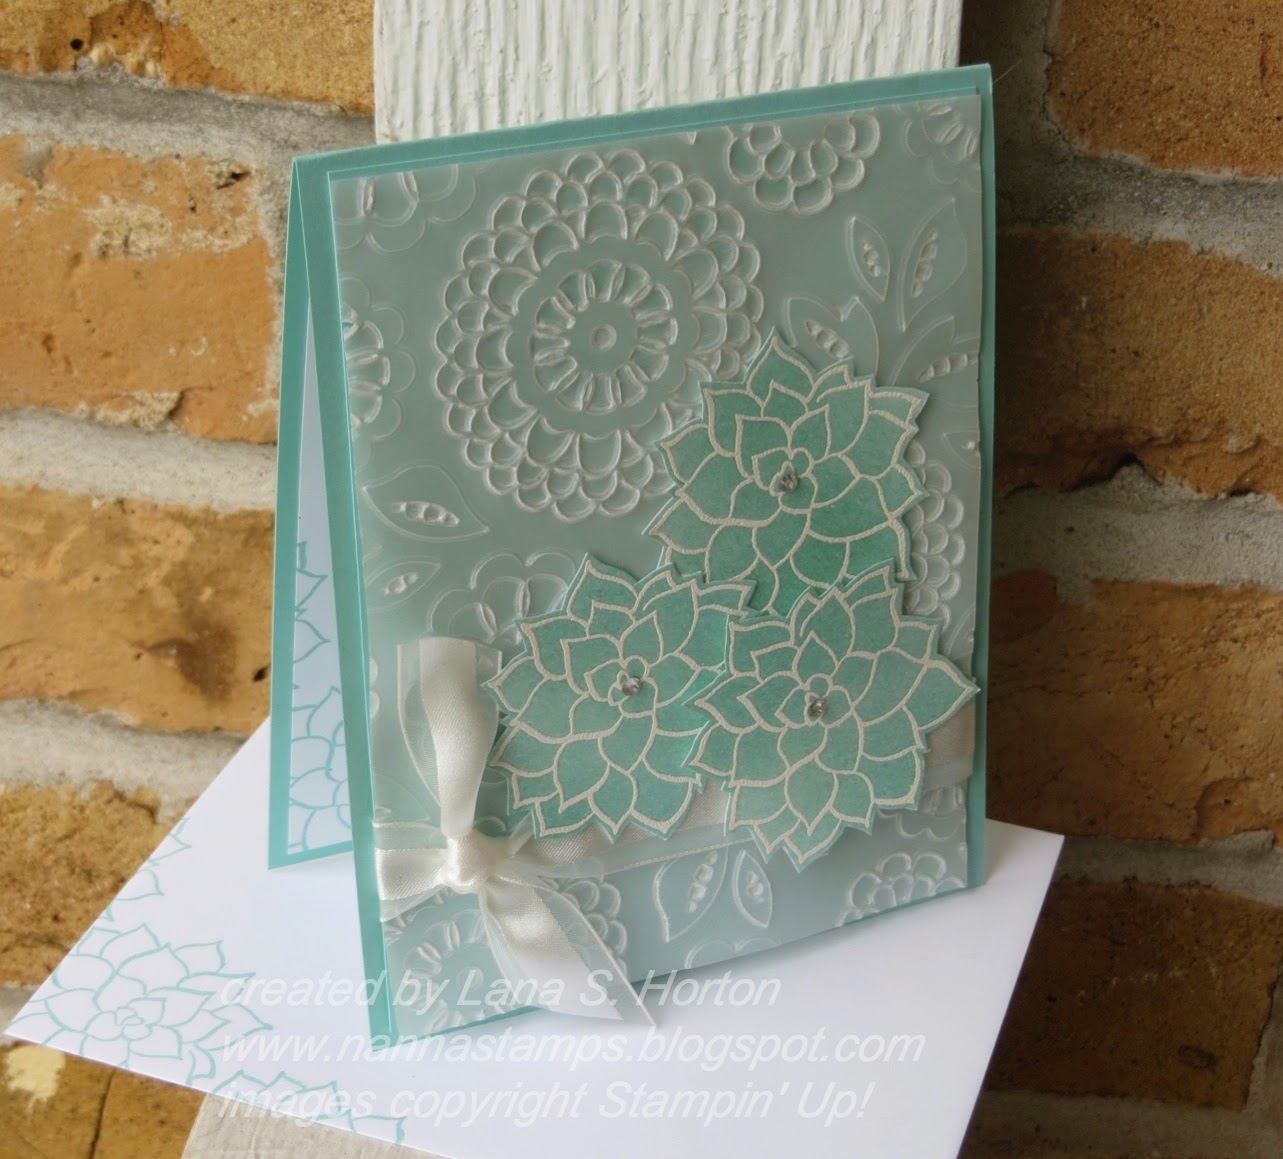
The third card in the trio features a trio of lotus blossoms and some gorgeous Blackberry Bliss Bakers Twine.  Don't try to say that too many times in a row:)
I added a strip of DSP to embellish the inside of this card, too.
So, now it's time to choose.  Which card in my trio do you like the best?
- Click on the tab at the top of the page to see my class schedules and registration policies or click on the left for sneak peeks. 
- Thanks for stopping by my little corner of the blogging world.
- Come back soon and come back often for more creative inspiration.

Monday, March 30, 2015

Crisp Cantaloupe Card and a Treat Bag

I have another card with a matching surprise for you today.   This one is a Sahara Sand and Crisp Cantaloupe combo.  Let's look at the treat holder first.
The holder is made using our French Fry Box Bigz Die.  You simply cut 2 and use only the backs of each one.  The little photo tutorial below shows how to put it all together.  
I just added a squiggle of watercolor onto the embossed Thank You on a scrap of watercoloring paper and then, once dry, cut the v-cut using the Hexagon Punch.
The card just showcases the gorgeous background stamp.  I've embossed with white EP onto Crisp Cantaloupe CS.  I used parts of the stamp to decorate the inside of the card and the envelope.
I lightly sponged the doily to blend in to the vintage look of the card.
The flowers are from our Artisan Embellishment Kit.
I masked off part of the inside of the card to stamp the lower border.
Pretty?
- Click on the tab at the top of the page to see my class schedules and registration policies or click on the left for sneak peeks. 
- Thanks for stopping by my little corner of the blogging world.
- Come back soon and come back often for more creative inspiration.

Sunday, March 29, 2015

Blackberry Bliss Card and a Little Surprise

Today's card features the last of my 5 In Colors cards... in Blackberry Bliss.  I've used embossing, punches and embellishments from our Artisan Embellishment Kit to pull together the elegant look.  Be sure to keep scrolling down to see a little surprise I made to go with this card.
The circle punches help make the card a pretty quick and easy one to assemble.
Adding the embossed layer always bumps a card up to a new level of elegance. 
Whew!  That's all 5 of our In Colors.  So, how about a little surprise to go with this one?
Wouldn't this make a super fun gift for a special someone?  They'd have a beautiful card and their own Artisan Embellishment Kit
I've simply wrapped the paper around the box from the kit.  They can actually slide everything out and save the wrapping.  Perhaps they could use the kit, save the box, put a new treat in the box, place it back into the wrapping and pass on the joy to another special someone.
- Click on the tab at the top of the page to see my class schedules and registration policies or click on the left for sneak peeks. 
- Thanks for stopping by my little corner of the blogging world.
- Come back soon and come back often for more creative inspiration.

Saturday, March 28, 2015

Four Feathers and Lost Lagoon

I think today's card just might be my favorite of all 5 of my In Colors cards.  I've used embossed vellum and embossed CS to create a 'bouquet' of feathers.
The feathers stamps have coordinating framelits, so there's nothing to cut by hand.
Does the lone feather on the inside of the card remind you of Forrest Gump?
- Click on the tab at the top of the page to see my class schedules and registration policies or click on the left for sneak peeks. 
- Thanks for stopping by my little corner of the blogging world.
- Come back soon and come back often for more creative inspiration.

Friday, March 27, 2015

Beautiful Hello Honey

For our third In Color card, let's look at Hello Honey.  I love this color.  Hello Honey and Lost Lagoon have tied for favorites with me since they were first introduced.
This is one of those cards that you marvel at how pretty it is and yet super simple to make it.  The thanks goes to the border stamp and the little flower punch.
In my next post, I'll share another one of the In Colors.  Be sure to come back to see.

- Click on the tab at the top of the page to see my class schedules and registration policies or click on the left for sneak peeks. 
- Thanks for stopping by my little corner of the blogging world.
- Come back soon and come back often for more creative inspiration.

Thursday, March 26, 2015

A Mossy Meadow Card with Double Layers

What color do I have up for you today?  It's gorgeous Mossy Meadow.
This simple card is bumped up in elegance by adding additional layers.  I've wrapped the ribbon around just the top 2 layers.
I love adding the little finishing touches to the insides of the cards and their envelopes.
- Click on the tab at the top of the page to see my class schedules and registration policies or click on the left for sneak peeks. 
- Thanks for stopping by my little corner of the blogging world.
- Come back soon and come back often for more creative inspiration.

Wednesday, March 25, 2015

Tangelo Twist in Two Versions

Today, I have 2 versions of a card for you, featuring one of our 2014-2016 In Colors.  These are made from a pack of pre-cut and pre-scored card bases.  We'll continue until we've worked through all five of the colors.  First up today is Tangelo Twist, with some of our Birthday Bash Specialty DSP.  I made 2 versions of the card ... same design ... different DSP.
Can you tell what 3 punches I've used here?  As always, I've added touches to the envelopes and the insides of the cards to coordinate everything.
Which version do you like the best?
In my next post, I'll share another one of the In Colors.  Be sure to come back to see.

- Click on the tab at the top of the page to see my class schedules and registration policies or click on the left for sneak peeks. 
- Thanks for stopping by my little corner of the blogging world.
- Come back soon and come back often for more creative inspiration.

Tuesday, March 24, 2015

Old World Elegance

Today's card is really unique and I love it.  I created it using techniques that I kind of made up as I went along with.  That's the fun of being an artist.  You make your own rules and dance to your own music.  This card started out with my Watercoloring Technique for the background.  I then stamped our World Map background stamp over it and embossed it in gold.
I added gold ink to the envelope edges and around the edges of the inside of the card, using the 'Direct to Paper' method and then embossed them with gold EP.  Very cool!  My goal was to achieve a rustic, old world look.  I love how it all turned out.
I opted to go with no sentiment at all on the card front.  This card is intended for writing a personal note to a special someone.  I didn't feel like it needed any words just yet.  The card front is mounted onto a layer of gold foil and then attached to the black card base.  It's even prettier in real life.  Some of the most gorgeous elements are the most difficult to photograph.
- Click on the tab at the top of the page to see my class schedules and registration policies or click on the left for sneak peeks. 
- Thanks for stopping by my little corner of the blogging world.
- Come back soon and come back often for more creative inspiration.

Monday, March 23, 2015

A Really Pretty Card

Sometimes, I just like to make a really pretty card.  With Coastal Cabana and embossed vellum, it just has to come out pretty.
I embossed the 3 flowers (with White EP) onto our Shimmery White CS and then sponged over them with Coastal Cabana.  I stamped the same flower on the inside of the card and on the coordinating envelope. 
I could see changing out the 3-D flower images and turning this into a baby card.
I hope I've gotten you inspired to start creating some Spring cards of your own.  It's good for your soul.

- Click on the tab at the top of the page to see my class schedules and registration policies or click on the left for sneak peeks. 
- Thanks for stopping by my little corner of the blogging world.
- Come back soon and come back often for more creative inspiration.

Sunday, March 22, 2015

Thanks Card

I woke up feeling very blessed and thankful this morning, with Psalms 30:5 on my mind, particularly the part... 'Weeping may last for a night, but joy cometh in the morning.'  My knee is enough better that I took Lilly for a walk (her first walk outside our yard, really) all around our circle.  It was wonderful.  We enjoyed it so much.  I started with Buster, but he got so distracted that he couldn't focus on walking at all.  I'll work with him more in the yard and try again another time.  I know I have a long way to go, but I am so thankful to have been able to do this.  For me, this was a big deal.  I am thankful and full of joy.  So... here's a card of thanks.
This card was inspired from one right out of our catalog.  I haven't used Tempting Turquoise for a long time and enjoyed playing again with this beautiful color.
The text is embossed with white EP.  I love the beautiful font.
Attaching a little punched flower just adds so much.  I put a tiny rhinestone at the center.
Thanks for stopping by my little corner of the blogging world.  Come back soon and come back often for more creative inspiration. 
Related Posts Plugin for WordPress, Blogger...